Trend Graphs
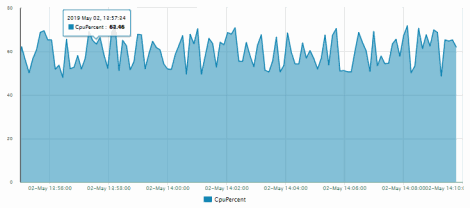
Trend graphs enable you to view and compare various important metrics over time, such as server memory utilization, server throughput, the number of clients being served by the server, or the total amount of data sent to clients. You can use trend graphs to assess utilization and performance trends.

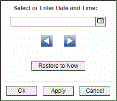
By default, the time range end point is the current time. To change the time range for the trend graph click Open Calendar  , choose the date and time, then click OK. Or enter the date and time in the text field using the following format: MMM dd, YYYY HH:MM:ss. For example, Apr 26, 2012 5:01 PM. Click Apply. Use the Navigation Arrows
  to move forward or backward one time period (the time period selected from the Time Range drop-down menu). Click Restore to Now to reset the time range end point to the current time.
Mouse-over
The mouse-over functionality provides additional detailed data in an over imposed pop-up window when you mouse-over trend graphs. The above figure illustrates mouse-over functionality. In this example, when you mouse-over a single dot, or data point, in the Out Msgs / sec trend graph, a pop-up window shows data for that data point. In this case, the X-axis value is 13:15:29 hours on September 6th, and the Y-axis value is 22 Outbound messages per second.
Log Scale
Typically, trend graphs provide the Log Scale option. Log Scale enables you to see usage correlations for data with a wide range of values. For example, if a minority of your data is on a scale of tens, and a majority of your data is on a scale of thousands, the minority of your data is typically not visible in non-log scale graphs. Log Scale makes data on both scales visible by applying logarithmic values rather than actual values to the data.
Time Range
Select a time range from the drop down menu varying from 2 Minutes to Last 7 Days, or display All Data. By default, the time range end point is the current time. To enter a specific time range, click the associated ellipsis button  .
.

To change the time range click the Open Calendar button  , choose the date and time, then click OK. Or, enter the date and time in the text field using the following format: MMM dd, YYYY HH:MM:ss (for example, Aug 21, 2011 12:24 PM) and click Apply. Use the Navigation Arrows
  to move forward or backward one time period (the time period selected from the Time Range drop-down menu). Click Restore to Now to reset the time range end point to the current time.