Download SolacePubSubMonitor_<version>.zip to your local server and extract the files: unzip -a SolacePubSubMonitor_<version>.zip
Important: On UNIX systems it is a requirement that the installation directory path not contain spaces.
Navigate to the SolacePubSubMonitor/bin directory and execute ./start_servers.sh -eval (start_servers.bat -eval in Windows).
NOTE: To stop the PubSub+ Monitor when it’s running in evaluation mode, execute ./start_servers.sh -eval (start_servers.bat -eval in Windows).
Browse to the following URL and login (rtvadmin/rtvadmin) to open the RTView Configuration Application HOME page:
-
http://IPAddress:8068/rtview-solmon-rtvadmin if you are executing your browser on a different host than where the monitor is running.
-
http://localhost:8068/rtview-solmon-rtvadmin if you are executing your browser in the same host where the monitor is running.
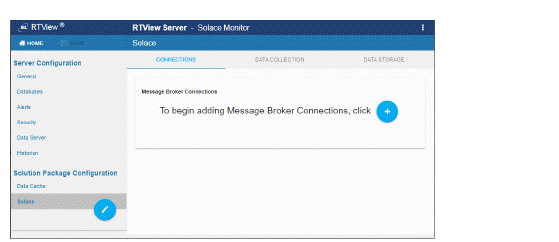
Select the Solace Monitor project to open the Solace configuration page.

Select Solace in the navigation tree (left panel), then click  to add a broker connection.

In the Add Connection dialog, toggle ON either HA Pair or Standalone Broker and make the following entries:
-
HA Pair: Enter the Connection Name, Primary and Backup URLs, Usernames and Passwords. Turn on the SSL Connection toggle if your broker pair is SSL Secured.
-
For Cloud Service Brokers, enter the Connection Name, URL, Username, Password, SEMP Version* and VPN Name. Turn on the SSL Connection toggle if your broker is SSL Secured. See Obtain SEMP Version for instructions about getting the SEMP version installed in your message brokers.
-
For Non-Cloud Service Brokers, enter the Connection Name, Host:Port, Username and Password. If the broker is secured, the URL should use https instead of http.
Repeat these steps to add more brokers and when finished, click  to close the dialog and
  (in title bar) to save your settings.
The connections you created are listed in the Connections tab. For the HA Pair, the connection string for the backup broker will have "-standby" concatenated to it.
If you turn on the SSL Secured option for any of your connections, select SECURITY (in the navigation tree) and fill in the SSL Credentials section with the appropriate Truststore and Truststore Password values for your Brokers.
Click  (in title bar) to save your settings.
Click  to apply changes. The data server will be available again in 10-15 seconds.
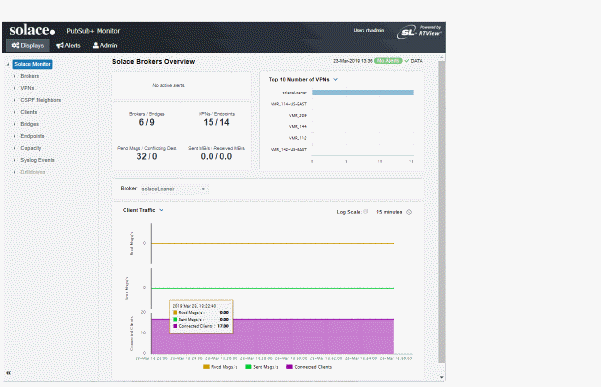
Browse to the Solution Package for Solace and login (username/password are rtvadmin/rtvadmin):
http://IPAdress:8068/rtview-solmon if you are running the monitor remotely
http://localhost:8068/rtview-solmon if you are running the monitor locally

You should now see monitoring data. If you encounter issues, check the log files in the SolacePubSubMonitor/projects/rtview-server/log directory for errors.
You have completed the Quick Start!
To stop the PubSub+ Monitor, execute ./start_servers.sh -eval (start_servers.bat -eval in Windows).