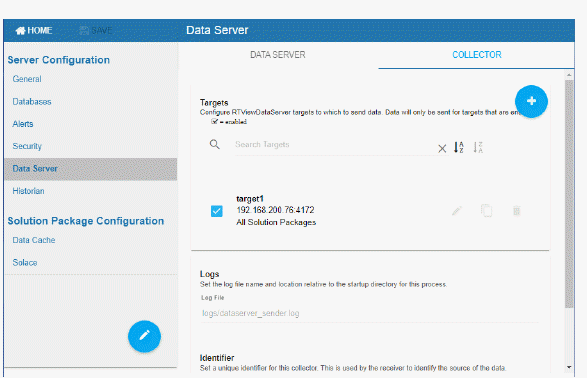
Use the COLLECTOR tab to setup the source and target data servers (the data servers that will send data and the data servers that will receive data). This tab is only visible if the project type is sender (for example, the project is run with the -propfilter:sender command line argument).
Click  to add a new Data Server target in the Add Sender Target Dialog, enter a unique ID and a URL, choose All solution packages to send data from all solution packages or choose Select solution packages to individually select from a list of Solution Packages.
To edit, copy or delete a Data Server, hover your mouse over the Data Server to bring the edit, copy and delete icons into focus. For example:

 Enable and
  SAVE settings when finished. Then
  (in title bar) to save changes locally.
The DATA SERVER tab has the following fields:
|
Field Name |
Description |
|
Sender Targets |
This is a list of receiver Data Servers that the sender Data Server sends data to. |
|
|
When checked, enables the Data Server to receive data from sender Data Server. |
|
Log File |
The log file name and location relative to the startup directory for the sender Data Server process. |
|
Sender Identifier |
The unique ID for the sender Data Server. |
The Add Sender Target dialog has the following fields:
|
Field Name |
Description |
|
ID |
The unique ID for the receiver Data Server. |
|
URL |
The URL for the receiver Data Server. |
|
Targets |
All solution packages choose this option to send data from all solution packages to the receiver Data Server. Select solution packages choose this option to see a list of all available solution packages, and send data from a subset of those. |
|
|
When checked, enables the Data Server to receive data from sender Data Server. |
|
|
Saves the settings locally. To apply changes use |


