Quick Start
These instructions are for those customers who wish to evaluate the Solution Package for Solace for purchase. These are the minimum steps required to gather monitoring data and get the Monitor up and running. Default settings are used and Apache Tomcat, which is delivered with the Monitor, is preconfigured as the default application server.
After you complete your evaluation, if you wish to setup and use all monitoring features in your organization, see Configuration.
- Obtain login credentials for each Solace broker you wish to monitor.
- A supported Java JDK (see System Requirements)
- Set the JAVA_HOME environment variable to point to your Java installation, and add JAVA_HOME/bin to the PATH. For example:
UNIX
export JAVA_HOME=/opt/Java/jdk1.8.0
export PATH=$PATH:$JAVA_HOME/binWindows
set JAVA_HOME=C:\Java\jdk1.8.0
set PATH=%PATH%;%JAVA_HOME%\bin - Linux Users: These instructions require a Bourne-compatible shell.
To evaluate Solace PubSub+ Monitor:
-
Navigate to the SolacePubSubMonitor/bin directory and execute
LINUX/UNIX: ./start_servers.sh -eval
WINDOWS: start_servers.bat -eval -
Browse to the following URL and login (rtvadmin/rtvadmin) to open the RTView Configuration Application HOME page:
-
http://IPAddress:8068/rtview-solmon-rtvadmin if you are executing your browser on a different host than where the monitor is running.
-
http://localhost:8068/rtview-solmon-rtvadmin if you are executing your browser in the same host where the monitor is running.
-
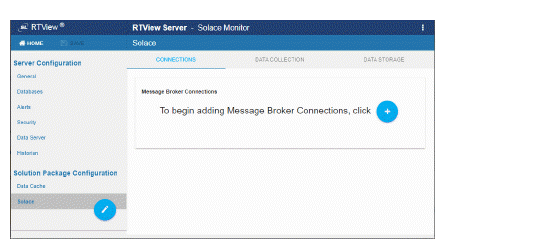
Select the Solace Monitor project to open the Solace configuration page.

-
Select Solace in the navigation tree (left panel), then click
 to add a broker connection.
-
In the Add Connection dialog do the following:
- Toggle ON Edition if your broker is a PubSub+ Event Broker as a service instance.
- For Cloud Service Brokers, enter the Connection Name, URL, Username, Password, SEMP Version* and VPN Name. Turn on the SSL Connection toggle if your broker is SSL Secured. See Obtain SEMP Version for instructions about getting the SEMP version installed in your message brokers.
- For Non-Cloud Service Brokers, enter the Connection Name, Host:Port, Username and Password. If the broker is secured, the URL should use https instead of http.
- If you are connecting via SSL, toggle ON SSL Secured, select SECURITY (in the navigation tree) and fill in the SSL Credentials section with the appropriate Truststore Location and Truststore Password values for your Brokers.
-
Repeat these steps to add more brokers and when finished, click
 to close the dialog and
  (in title bar) to save your settings.
 -
Click
 to apply changes. The data server will be available again in 10-15 seconds.
 -
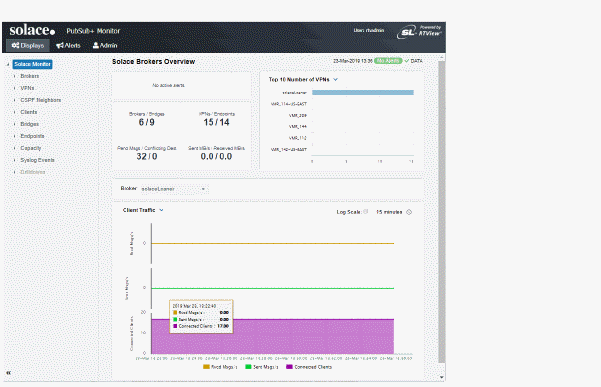
Browse to the Solace PubSub+ Monitor and login (username/password are rtvadmin/rtvadmin):
-
To stop the Solace PubSub+ Monitor, execute
LINUX/UNIX: /stop_servers.sh -eval
WINDOWS: stop_servers.bat -eval
Tip: Gray text shows the default setting for the field which you can edit. To return to the default setting, delete the text you entered.
The connections you created are listed in the Connections tab.
http://IPAdress:8068/rtview-solmon if you are running the monitor remotely
http://localhost:8068/rtview-solmon if you are running the monitor locally

You should now see monitoring data. If you encounter issues, check the log files in the SolacePubSubMonitor/projects/rtview-server/log directory for errors.
You have completed the Quick Start!
If you wish to setup and use all monitoring features in your organization, proceed to Configuration.